Assembling a bottom bracket can get confusing. Mostly because there’s so much you have to do to get it right. I say that now and some people may think “psht, no there’s not!” I dare them to think back to their first bottom bracket assembly ever, given they may have no prior knowledge of what a bearing even is. Now how does that feel? Anyway, let’s get down to it and make a list of everything that you’ll need for assembling your bottom bracket.
PHASE 1:
1-Bearings
2-Tube/Internal Spacer
3-Bearing Press
These do not include what you’ll need to set up your crank and chainwheel and all of that after. Those tools/parts only include what is needed for setting up your bearings in to your frame. I don’t know why I called it phase 1 (maybe because there’s a phase 2?)
The first thing is the tube spacer. Simply put, I am not going to argue right now about whether this is necessary or not, so I’ll just get down to the fact that it should be. I’ll address that later in the FAQ’s for this article.
Sizing up your internal spacer is much easier than most people think. Most people think something along the lines of putting it in, finding out it doesn’t work….trial and error, or taking thousands of precise measurements….Ignore all of those. There is one simple method to measuring up your bottom bracket:
http://www.odysseybmx.com/dailyword/archives/a%20bb%20check.jpg
What this picture shows is the method. When I do this I place them on the spindle to hold them, but you don’t have to. This method shows where the bearings will rest in the frame when the tube spacer is used between them. If the bearings aren’t far enough out, then add a small spacer. If the bearings are too wide, then you cannot simply remove a spacer. Most tube spacers are set at a standard that is a few millimeters below the common range, to allow the user to adjust it to fit their frame. However, sometimes it is just too long. (please, no sexual references).
When the spacer is too long, you need to shorten it. It’s much easier than you think. Guess how much shorter it needs to be, or measure. Mark on your spacer where it needs to be, and then rub it on sand paper or use a file. They trim down very easily. If you get an uneven surface after trimming, then simply trim it down a little bit more to a flush surface, and add a spacer.
Also keep in mind that the bearings MAY sit outside of the frame by up to 3mm on the non-drive side. This is not a technical standard, but more of a person rule. Your personal rule may be 1mm or 6mm. Okay, not 6mm…But you get the point. The bearings do not HAVE to be flush. If they hang over by 1-3mm or so, it’s fine, at least on the non-drive side. I do not recommend allowing the bearings not to be flush on the drive side, because of chain alignment.
Once the spacer is the correct length, it’s time for assembly:
First, get friendly with the grease again! Grease the outer edge of the bearings. The spindle isn’t AS necessary, at least if you follow this guide. That will come in the next phase, but you can if you want to in this phase.
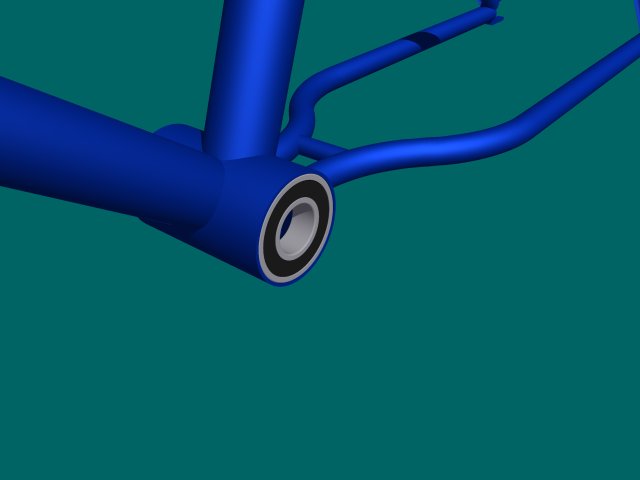
1- Using a bearing press, press ONE bearing in to the frame. DO NOT do the second one yet.
PHASE 1:
1-Bearings
2-Tube/Internal Spacer
3-Bearing Press
These do not include what you’ll need to set up your crank and chainwheel and all of that after. Those tools/parts only include what is needed for setting up your bearings in to your frame. I don’t know why I called it phase 1 (maybe because there’s a phase 2?)
The first thing is the tube spacer. Simply put, I am not going to argue right now about whether this is necessary or not, so I’ll just get down to the fact that it should be. I’ll address that later in the FAQ’s for this article.
Sizing up your internal spacer is much easier than most people think. Most people think something along the lines of putting it in, finding out it doesn’t work….trial and error, or taking thousands of precise measurements….Ignore all of those. There is one simple method to measuring up your bottom bracket:
http://www.odysseybmx.com/dailyword/archives/a%20bb%20check.jpg
What this picture shows is the method. When I do this I place them on the spindle to hold them, but you don’t have to. This method shows where the bearings will rest in the frame when the tube spacer is used between them. If the bearings aren’t far enough out, then add a small spacer. If the bearings are too wide, then you cannot simply remove a spacer. Most tube spacers are set at a standard that is a few millimeters below the common range, to allow the user to adjust it to fit their frame. However, sometimes it is just too long. (please, no sexual references).
When the spacer is too long, you need to shorten it. It’s much easier than you think. Guess how much shorter it needs to be, or measure. Mark on your spacer where it needs to be, and then rub it on sand paper or use a file. They trim down very easily. If you get an uneven surface after trimming, then simply trim it down a little bit more to a flush surface, and add a spacer.
Also keep in mind that the bearings MAY sit outside of the frame by up to 3mm on the non-drive side. This is not a technical standard, but more of a person rule. Your personal rule may be 1mm or 6mm. Okay, not 6mm…But you get the point. The bearings do not HAVE to be flush. If they hang over by 1-3mm or so, it’s fine, at least on the non-drive side. I do not recommend allowing the bearings not to be flush on the drive side, because of chain alignment.
Once the spacer is the correct length, it’s time for assembly:
First, get friendly with the grease again! Grease the outer edge of the bearings. The spindle isn’t AS necessary, at least if you follow this guide. That will come in the next phase, but you can if you want to in this phase.
1- Using a bearing press, press ONE bearing in to the frame. DO NOT do the second one yet.
2- Insert the spindle through the one bearing. Also put the tube spacer on the spindle.
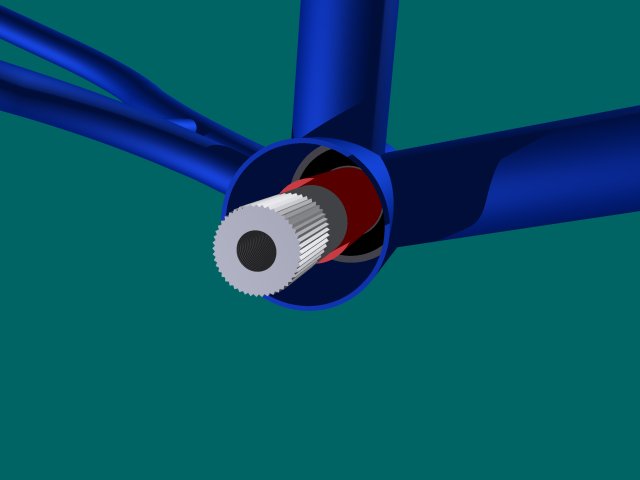
3- Using a rubber mallet, or a hammer with a block of wood, hit the other bearing in to the frame. In doing this, your internal spacer is in place, rather than trying to maneuver it into place after both bearings are on.
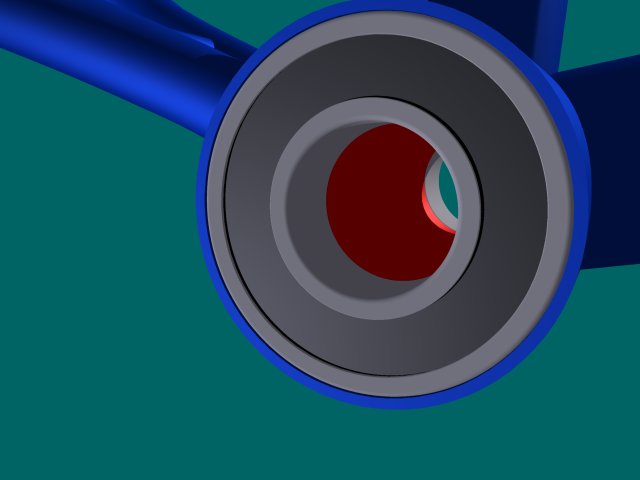
4- This is an extra step, but I recommend it. Remove the spindle and check that the tube spacer is in place and held in with tension. At this stage, you may put your bearing press to use again and try to see if the bearings can go in any more, but please do not overdo it.
4- This is an extra step, but I recommend it. Remove the spindle and check that the tube spacer is in place and held in with tension. At this stage, you may put your bearing press to use again and try to see if the bearings can go in any more, but please do not overdo it.
Alright, after that you're good to go to set up your crank. That's going to be the next article, #8.
 RSS Feed
